The fruits of my week-long labors were finally harvested last night at my friend Katina’s wedding where, after a beautiful and moving ceremony, we rocked out at the Space Gallery in Denver and feasted on my first attempt at a wedding cake—a wobbly, 4-tiered flavor sensation that was 18 months on the drawing board before last night. A few thoughts about the experience: the learning curve was steep. If I ever do this again (it’s too early to say either way, but I’m definitely over licking the beaters for awhile), I will enlist an assistant, will experiment with cake recipes until I find one that is a little sturdier without compromising its moist deliciousness, will buy ready-made fondant instead of making it myself, and will have the air-conditioning in my car fixed. Beyond some of the challenges and the sheer amount of time that this project took (most of which was happy and meditative, and only a few hours of which were stressful and worrisome), it’s bordering on one of the most surreal undertakings of my life: there’s just something so hilariously Dada about cracking 30 eggs into a bowl, or melting 10 cubes of butter in a pan, or manipulating a cake that’s 16 inches in diameter.
Here’s a brief walk-through of how the week unfolded.
First we need some supplies: cake boards to put the tiers on and dowels to support their weight.

Oh, just one more acquisition to make: Kitchen Aid Pro! I’ve been wanting a proper mixer forever, especially since I burned out the motor on my hand mixer trying to make 6 batches of cookies at once, and a wedding cake on the horizon seemed to be just the excuse to finally get one. Serendipitously, it arrived on Tuesday, the day I started baking.

In addition to the cakes, the filling needed to be made. Here’s part one of the raspberry filling. In my prototype cake that I made for Katina ages ago the raspberry was more of an ooze than a filling, so this time I stabilized it with some gelatin. Otherwise it’s nothing but raspberries, sugar and a little lemon juice.

The other filling was lemon curd (I have a slightly unhealthy obsession with lemon curd). Here’s the pile (5lbs) of lemons that I reamed to make this curdy dream come true:

And here are the rest of the curd fixins in the pan: lemon juice, sugar, 10 CUBES OF BUTTER, and eventually 30 eggs.

Here’s a 12-in tier cooled, trimmed, and waiting on its cake board for further instructions. I have SO many cake scraps in my freezer from the trimming process—two HUGE freezer bags. Last time I made the luscious Lemon Coconut Cake Top Bread Pudding—what will these bits become?

Here are the ingredients for one 16-in layer—practically bursting out of the bowl.

And here is the 16-in layer about to go in the oven—my hand in front is showing you just how absurdly large it is. I laughed every time I even saw this pan.

Time to whip up some butter cream frosting—for this cake we decided to go with rosewater butter cream.

Time to start filling and frosting the cakes. Each layer is split horizontally for a filling—raspberry came first.

In between the two layers is butter cream, then the second layer is split in order to accommodate a smear of lemon curd. This is the 4-in tier, which the couple planned to freeze for their one-year anniversary.

Using my dough scraper to spread the raspberry filling on the 16-in layer.

This one was a huge challenge, and what made me realize that I needed sturdier cake next time if I was going to be making such a large tier. It all turned out fine in the end, but there were some scary moments of oozing, cracking and general auto-destruction of the 16-in tier.

And now to make enough frosting to cover this beast. I think this is five batches of butter cream. Hah! At this stage the frosting is kind of like glue—whatever is falling apart can hopefully be cemented back together by a sturdy butter cream prison.

All done! Get this thing in the fridge asap!

Here are all four tiers, frosted and chilling in the refrigerator. Last step is the fondant, and then the on-site assembly with the final decorations.

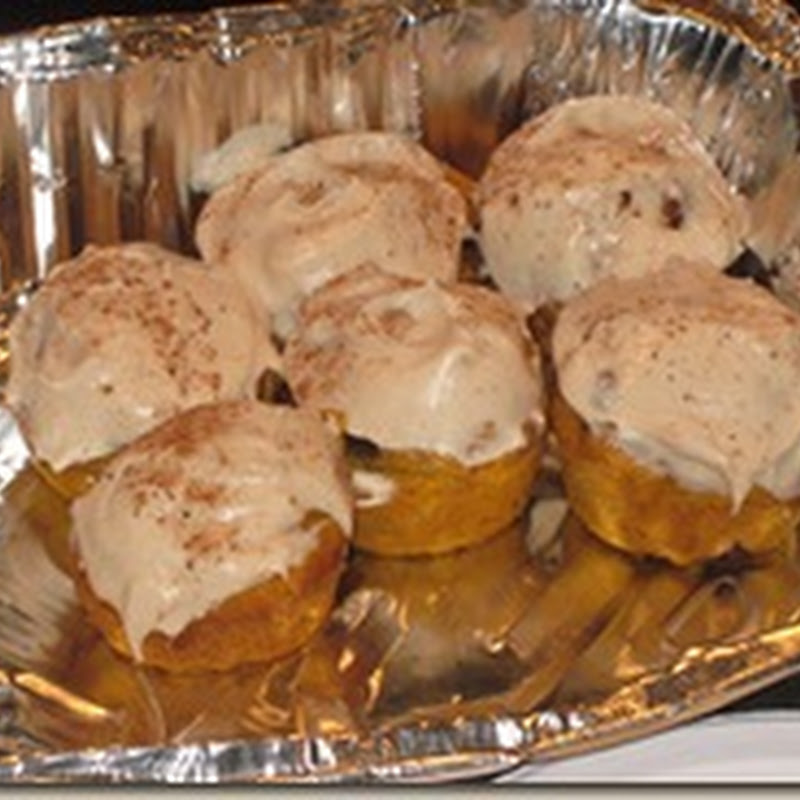
We had decided to do gum paste calla lilies decorations on the top of the cake and on the vegan cupcakes that Katina had requested for some of the guests. I watched a few tutorials in preparation for this and I think calla lilies are about the easiest flowers to make out of gum paste. All you need is a heart-shaped cookie cutter, some cones to dry them on, and a little patience. I tinted the gum paste a peach color, then used red Luster Dust in the centers for contrast and to match the red/pink of the bridesmaid dresses.

Chocolate cupcakes with almond custard and chocolate butter cream frosting, all vegan.

Here are the frosting decorations—little tiered swirls—calla lilies will follow.

All ready to go. Thankfully my friend Liz agreed to transport these in her air conditioned car so I didn’t end up with cupcakes swimming in a pool of butter cream.

Here’s the fondant going on the 12-in layer. So I’ve made this marshmallow fondant recipe scores of times with no problems whatsoever, but of course, the only time I would have any trouble would be the one time that I’m doing a cake that actually matters to someone, only on, like, the most important day of her life. (!!) For some mysterious reason, even though I sifted the powdered sugar, I ended up with all these little lumps in the fondant, and then it was all pockmarked and holey when I rolled it out. Whatcha gonna do? You just gotta roll with it. I warned the bride not to look to closely, and that was that. And once they dimmed the lights a little in the gallery you couldn’t see a thing.

And here she is, after a series of minor mishaps (like the gallery being locked when we arrived, the linens not arriving, and the cake stand totally not working at all). You can see that the bottom tier is burbling a little, but it’s standing and doesn’t look totally misshapen, so I was happy. And the bride and groom were thrilled, the guests thought it was delicious…over all a great success.

With the cupcakes nearby.

A few shots from the top.


Final thoughts: After last night, I’m pretty sure I wouldn’t want to make a career of this. Standing around watching the catering crew freak out when the gallery was locked and then their linens didn’t arrive was the stuff reality shows are made of, and so stressful to observe—never mind the fact that I couldn’t set the cake up either until the linens arrived. The baking can be blissful, but delivery and set up was a recipe for multiple ulcers. If anyone needs a favor, I’d be happy to oblige with a cake, but I don’t think I’ll be applying for a business license anytime soon.


Holy moly, girlfriend, that is AMAZING! It looks scrumptious! I think you deserve a week (at least) to sit back and put your feet up. :)
ReplyDeleteBeautiful! You did an amazing job!
ReplyDeleteKudos lady- what a great job! I'm with you on not getting a business license-it would take all the fun out of it!
ReplyDeleteSarah, you are the best!¡!¡
ReplyDeleteThe cake and the cupcakes were not only BEAUTIFUL they were also super DELICIOUS!¡!¡!¡ Big congrats :)
Congratulations, it's a girl! Lots of preparation and planning then a difficult delivery but the result is all worth it! Looks amazing!
ReplyDelete