Showing posts with label Bread. Show all posts

Wednesday, August 25, 2010

Zucchini Madness III: Bacon-Feta Summer Squash Muffins and Spicy, Honey-Sweet Zucchini Bread

The race to keep up with the squash plants continues, and this afternoon my kitchen was positively aflame while the toddler napped and the newborn nestled against my chest in the sling. The result: more savory muffins, this time with the unexpected combination of feta and bacon, and secondly a dark, spicy zucchini bread with natural sugar sources and whole grain flours.

Bacon-Feta Summer Squash Muffins

makes 12 muffins

1/2 C olive oil

1 C plain yogurt

2 eggs

1 green onion, minced

3 strips bacon, cook until crisp and crumbled

4 oz. feta cheese, crumbled

3 C grated summer squash

1 1/2 C whole wheat flour

1 C barley flour

1 1/2 tsp baking soda

1/2 tsp salt

1/2 tsp Greek seasoning (or a mix of garlic, oregano, mint, fennel)

Preheat oven to 350 degrees. Whisk together oil, yogurt and eggs. Stir in bacon, feta and squash. Mix dry ingredients in a separate bowl, then add to wet. Stir until just combined. Fill twelve muffing cups completely full.

 IMG_8198  

Bake for 20-25 minutes.

IMG_8201 

Spicy, Honey-Sweet Zucchini Bread

Makes one large loaf

1/2 C oil

1 C honey

1/2 C maple syrup

1/2 C milk

2 eggs

3 C grated zucchini

1 1/2 C whole wheat flour

1 C barley flour

1 C brown rice flour

2 tsp baking soda

1 tsp salt

1 Tbs ground cinnamon

1/2 tsp ground cloves

1/2 ground nutmeg

1/4 tsp cardamom

Whisk together oil, honey, syrup, milk and eggs. Stir in zucchini. Mix dry ingredients in a separate bowl, then add to wet. Stir until just combined. Pour into a well-greased 9-in loaf pan.

 IMG_8199

Bake for 50-55 minutes until a toothpick inserted in the center comes out clean.

IMG_8203

Thursday, August 19, 2010

Zucchini Madness I: zucchini fritters and zucchini french bread pizza

Makes 8-10 fritters and 2 8-in long pizzas

The season is upon us. The season of zucchini door ditching—look out, I might be leaving some on a porch near you. Last night I did my best to incorporate the intimidating harvest into some dishes that would be a little bit novel for Chris, who, in truth, doesn’t even like zucchini very much. I thought they both turned out great—the pizza especially, due to the deeply flavored roasted tomatoes. But more about that in a minute; let’s start with the fritters.

I had never made fritters before—in fact, I’m not sure that I’d ever eaten them. So I went to the internet and found a highly rated and very easy recipe—after all, I’ve got a newborn on the boob and a toddler on my lap, and right now simplicity takes precedence over culinary innovation and complexity. Therefore: this recipe has some ingredients that I wouldn’t ordinary use (out of excessive snobbiness and mild obsession), but they won’t kill ya, and next time I try them I’ll experiment with whole grain flours and natural seasonings. Conclusion: I loved the crispy edges and the fluffy center, and think they deserve a place in the pantheon of zucchini door ditching season favorites.

IMG_8166 

2 C grated zucchini

1/2 C milk

1 egg

1 C flour

1/2 oz. ranch dressing seasoning

1 1/2 tsp baking soda

Mix all ingredients until combined. Heat 1/2 to 1 inch canola oil in a large skillet. Drop four fritters (about 1/4 C batter each) into the oil. Cook about 4-5 minutes per side until golden and puffed up.

IMG_8161

 IMG_8162

And now the French bread pizzas (which could, of course, be made on regular ole pizza dough—we had half a loaf of delicious homemade bread left over from generous friends who brought us dinner after Fielding was born). As I said above, what really set these apart was the roasted tomato topping, which idea I pilfered from Passionate About Baking. Except that I had exactly five extremely ripe tomatoes when her recipe called for much more, so I knew that it wouldn’t go far. But the flavor is so deep, so resonant, it was the perfect way to use up tomatoes that were on their way out. All you do is half and seed your tomatoes, salt them and let them drain for a few minutes, then drizzle them well with olive oil and put them in a 250 degree oven for 4-5 hours--I used the toaster oven. By that time they should be shriveled, soft, and pungently flavored. Mash them up or put them in the food processor, and then you can either spread them on pizza crust, canapes, or pack them in oil and preserve them in the fridge for awhile. Here are mine, all mashed up:

IMG_8158

1/2 C roasted tomatoes, chopped or mashed

1 link cooked sausage (we used andouille)

1 medium zucchini, sliced into thin ribbons using a vegetable peeler or mandolin

1/2 green pepper, thinly sliced

1 clove garlic, minced

1 Tbs lemon juice

shredded cheese (we used cheddar jack)

Slice your 8-in hunk of baguette horizontally. Drizzle olive oil on each half, rub with a clove of garlic and toast until lightly browned.

While bread is toasting, sauté the garlic and green pepper in a little olive oil until they begin to soften. Add the zucchini, stirring frequently until soft. Add lemon juice and salt and pepper to taste. Set aside.
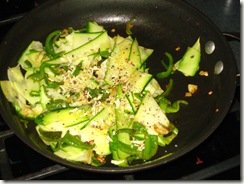
IMG_8156

Spread roasted tomatoes on each baguette half, top with sliced sausage, zucchini mixture and cheese.

   IMG_8159

Broil until cheese is melted and beginning to brown.

IMG_8163

Monday, August 16, 2010

Savory Summer Squash Muffins

makes 12 muffins

 IMG_8119

The garden—and in particular the squash plants—is running amok. I’ve already got three bags of frozen shredded zucchini waiting to emerge on a winter day in need of a little sunshine. And now the summer squash is starting to overwhelm me, and I am kind of sick of sweet quick breads (blasphemy!). Enter the savory muffin! I have great plans to experiment on this technique, especially since my friend Lisa recently shared with me that she’s been making muffins on the BBQ (!!). But for round one, I made a fairly basic incarnation of the savory muffin.

1/2 C oil (olive or canola)

1 C milk + 1 Tbs lemon juice (mixed together and left to curdle 5 minutes—or if you have real buttermilk, even better!)

2 eggs

2-3 C shredded summer squash

1/4 C minced chives or green onion

1 C whole wheat flour

3/4 C all-purpose flour

1/2 C barley flour

1/2 tsp salt

1 1/2 tsp baking soda

1/4 tsp dried dill

1 tsp Parisian bonnes herbes

1/2 – 1 C shredded cheese (I used cheddar jack)

Whisk together oil, milk + lemon juice and eggs, then stir in squash and chive/onion. In a separate bowl whisk together dry ingredients (including spices). Add dry ingredients to wet, stirring until just combined. Gently incorporate shredded cheese. Preheat oven to 350. Fill muffin cups close to full. Bake 18-20 minutes, or until muffin tops spring back when touched.

Sliced in half, toasted, with some scrambled egg and ham…about the most satisfying breakfast I can think of.

IMG_8121

Sunday, July 25, 2010

Grilled Pizza with Beet Greens and Heirloom Tomatoes

Serves 4

IMG_7922

I can’t believe how well this turned out. I’m still sort of gloating in my mind over how delicious it was, even if Chris did say, “too bad there was no Italian sausage to put on here…” What’s even better, it helped me use up all the beet greens from the garden that I’ve been saving while on some kind of insane beet-eating quest this week. Seriously, I’ve had beets in some form or other for lunch everyday since Monday I think. Anyway, you could do this pizza with a huge variety of different toppings, obviously. What makes it special, I think, is the pesto, the combination of feta and mozzarella, and the fact that it’s grilled rather than oven-baked (always a plus when the temps are in the 90’s).

Dough:

1 1/2 C white flour

1 1/2 C wheat flour

1 tsp dry active yeast

2 tsp kosher salt

2 Tbs olive oil

1 1/4 C water

Combine all ingredients in your food processor. Process for 30 seconds until mixture forms a ball. Turn out onto a lightly floured surface and knead a few times until smooth. Place in an oiled bowl and cover with a dish towel. Let rise in a warm place for 1-2 hours.

Toppings

Several cups of beet (or other) greens (mine actually included the last of some garden spinach too)

1-2 cloves garlic, minced

olive oil

balsamic vinegar

pesto

feta cheese

sliced tomatoes

fresh basil

Mozzarella cheese (I used an Italian blend this time, with Asiago, etc.)

Start by washing and chopping your greens, then sautéing them in a little olive oil with the garlic. After they’re good and wilted and are starting to get dry, give them a splash of balsamic vinegar, sprinkle on a little sea salt and turn off the heat.

IMG_7912

When the crust is ready you just need to decide what your grilling system is going to be. Some advocate preheating the grill, rolling out the dough, oiling it on both sides, then placing it directly on the grate. You cook it on one side for a few minutes, flip it for another few, and THEN put your toppings on. I actually didn’t know about this technique when I started tonight, so I used the vegetable basket for our grill, and spread the dough on it (after oiling it up good) like so:

 IMG_7915

I spread pesto sauce on it after pressing it into the basket. Look at this glorious container of farmer’s market termaters:

IMG_7914 

On top of the pesto I spread the greens, topped with a little feta (I always leave cheese quantities to your discretion—we tend to go easy), and then the tomatoes.

IMG_7917

Tear up some fresh basil and sprinkle it over the tomatoes, then top with shredded mozz or Italian cheese blend of your choice. Fresh mozz would, of course, have been out of this world, but we were plum out.

IMG_7918

I let the grill heat to about 450 or 475 before putting the pizza in, and cooked it for about 12 minutes, which was perfect. Here she is just as I’m about to remove and slice ‘er.

IMG_7919

So stinkin’ pretty! And what’s better than cutting up homemade pizza on your patio and taking in the evening air?

IMG_7920 

This is the happiest plate ever. And the happiest belly. Mama will be happier when Sawyer doesn’t insist that she cut the skin off the peaches.

IMG_7924

Friday, July 16, 2010

Cornmeal popovers

Makes 10-12

IMG_7877

We had these with our tofu scramble the other night…mmmmm.

1 cup milk

2 medium eggs

2/3 cup flour

1/3 cup cornmeal

1 tablespoon sugar

1/2 teaspoon salt

The instructions say to do these in a muffin tin, but I opted for the toaster oven and soufflé cups, and made them a lot bigger than you would in a muffin tin. You get to choose. Preheat your oven to 450°. Oil or grease a muffin tin or soufflé cups. Put the pan/cups into the oven to preheat while you prepare the batter.

In a medium sized bowl, whisk together the milk and eggs. Add the flour, cornmeal, sugar and salt. Beat very well, making a nice thick, smooth batter. Take the hot muffin tins out of the oven and distribute the batter evenly among the hot oiled cups. Return the pan to the oven and cook for 15 minutes. The tops will start to puff up at this point. Turn the oven down to 350° and cook for 15 to 20 minutes longer. Let popovers cool for a few minutes before removing from muffin tin or soufflé cups. Very tasty with a little honey.

Saturday, June 5, 2010

Sweet Potato Biscuits

Serves 4-6

IMG_7608

Normally I am no lover of Paula Dean, but when I wanted to make some sweet potato biscuits and her recipe came up at the top, I knew I shouldn’t deny her the chance to do what she does best. Comparatively, these did not offend my nutritional sensibilities like many of her other recipes (like the Krispy Cream burgers or deep fried Snickers).  I think it’s her total disregard for any notion of nutrition whatsoever, or moderation, or whole foods, or something, that I find alarming (and irresponsible) and that just kinda rubs me the wrong way, though I give her props for cooking a nostalgia-laden cuisine that brings people together. In any case, she doesn’t drive me as wild as Sandra Lee. Oh man, don’t get me started on Sandra Lee…

1 1/4 cups all-purpose flour

2 heaping tablespoons sugar

4 teaspoons baking powder

1/2 teaspoon salt

3/4 cup mashed cooked sweet potatoes

1/4 cup (1/2 stick) softened butter

2 to 4 tablespoons milk (depending on the moisture of the potatoes)

Preheat the oven to 450 degrees F.

Sift together flour, sugar, baking powder and salt. In a separate, large bowl, mix the sweet potatoes and butter. Add the flour mixture to the potato mixture and mix to make a soft dough. Then add milk a tablespoon at a time to mixture and continue to cut in. OR: do like I did and just put it all in the food processor, add milk until the dough comes together. Turn the dough out onto a floured board and toss lightly until the outside of the dough looks smooth. Roll the dough out to 1/2-inch thick and cut with a biscuit cutter. Place the biscuits on a greased pan and coat tops with melted butter. Bake for about 12-15 minutes. Watch your biscuits carefully to keep them from browning too fast.

Thursday, May 6, 2010

Leftover Cereal Muffins

Makes 12 muffins
 IMG_7206
I don’t know if other families face this problem, but Chris is a cereal eater--a particularly nocturnal cereal eater, I might add. But being forced to more or less be a lone ranger when it comes to finishing a box (I have different cereal tastes, and sometimes prefer other things for breakfast), he often leaves a few in the pantry with just a half cup or so, and they sit there for weeks, stalled out, in cereal limbo. So today I decided to clean up the loitering flavors and make them into some healthy muffins.
2 C leftover cereal (today’s mix included granola with raisins, some kind of banana clusters and Product 19)
2 C milk or soymilk
1/4 C olive oil
2 eggs
1/3 C honey
1 banana, mashed
2 small apples, cored and grated
1 1/2 C flour (I mixed whole wheat, barley and rice in equal parts)
1 tsp salt
1 tsp baking soda
Heat the oven to 375 degrees. Pour the milk over the cereal in a large bowl and let it sit for an hour or so. The cereal will absorb the milk and get nice and soft. Next stir in the oil, eggs, honey, banana and apple:
IMG_7188
Add the dry ingredients and stir until just combined. Fill your muffin cups to the brim, and bake for 16-19 minutes, or until muffins spring back when toughed lightly.
IMG_7203

Thursday, April 29, 2010

Best Banana Bread, Truly…

makes 1 9-in loaf

IMG_7136

I imagine most people have or have encountered a banana bread recipe that they believe to be the alpha-banana bread, the referent from which all banana-y signifiers spring, and this is mine. I was reminded of it, actually, when Mark Bittman (that name again!) reposted the recipe on his New York Times blog recently, a testament to its greatness, I suppose. As always I tweek it a little to diversify the flours, but like most recipes for standards such as this, it’s a great template for your imagination. According to Bittman, the coconut is the key.

1 C butter, softened

1 1/2 C white flour + 1/2 C whole wheat flour (I combined whole wheat, barley and rice, as I usually do)

1 tsp salt

1 1/2 tsp baking soda

3/4 C sugar (I used brown sugar)

2 eggs

3 ripe bananas

1 tsp vanilla

1/2 C grated coconut (Bittman recommends unsweetened, but I only ever have sweetened on hand and haven’t found that it’s too much)

1/2 C chopped nuts, optional

Preheat oven to 350 degrees. Pulse bananas in the food processor until coarsely chopped.

IMG_7132

Cream the butter and the sugar until fluffy, beat in the eggs and vanilla (I do this in my food processor too). Stir in eggs, then dry ingredients: flour, salt, baking soda, until just combined.

Allow little toddlers in dinosaur pajamas to taste the batter.

IMG_7134

Pour batter into a greased 9-in loaf pan. Bake for 40-50 minutes until a toothpick inserted in the center comes out fairly clean. 

IMG_7135

Wednesday, March 31, 2010

Whole Grain Zucchini Bread

IMG_6955 

My whole grain zucchini bread, pictured here with a gentle smear of cream cheese and a lazy drizzle of maple syrup, represents the fruits of a most propitious discovery: while rooting around in the freezer the other day looking for who-knows-what, I found two whole bags of shredded zucchini from last summer’s garden. And so, helping them to fulfill the measure of their creation (which I’d apparently wiped from my mind), I used one of them last night to concoct a whole grain recipe that is full of goodness. You always know a recipe is a success when Chris repeatedly, in between meals, slices the product, pours milk over it, and eats it with a spoon.

2 C grated zucchini

1/2 C olive oil

1/3 C honey

1/3 C real maple syrup

1/2 C thick plain yogurt (or 1/2 C silken tofu + 1 tsp vinegar or lemon juice for dairy-free version)

2 eggs

1 C whole wheat pastry flour

1/2 C brown rice flour

1/3 C barley flour

1/3 C oat flour (grind oats in your blender or food processor)

1/4 C wheat germ

1 tsp salt

1 1/2 tsp baking soda

1/2 Tbs cinnamon

optional: 1/2 – 3/4 C walnut pieces

Preheat oven to 350 degrees. Whisk together oil, syrup, honey, yogurt and eggs. (If using tofu, puree first, and add lemon juice/vinegar along with other ingredients.) Stir in zucchini. In a separate bowl combine dry ingredients. Add dry ingredients to wet, stirring until just combined. Add walnuts if desired. Ok, this is where things get sketch. Since I just made this recipe up as I went along, following my instincts, I wasn’t sure if I had too much batter for a single pan, or how that whole scene was going to play out in the oven. To be safe, then, I split the batter into two 9-inch loaf pans. I baked them for 30 minutes, and they were perfect, but made loaves that were only about 2-inches tall. If you’re worried about portion control maybe this is the best choice for you. But in retrospect, I think it all could have fit into one 9-in pan…but you’d have to bake it for, gee, I dunno, 40-50 minutes, I would guess. You’ll have to figure that out on your own. I think two 7-in loaf pans would also work well. Anyway, some experimentation to be undertaken still with this particular recipe, if anyone has nothing to do in the next few weeks.

Sunday, March 14, 2010

Irish Soda Bread

IMG_6777

I get into phases of baking Irish Soda Bread whenever I see buttermilk on sale at the store. The first time I’m sure I consulted a recipe, but afterwards I just tossed things together each time, tweeking this and that (especially with my whole grain obsession), making, apparently, blasphemous variations on the real thing. Or at least this is what I learned when I discovered the The Society for the Preservation of Irish Soda Bread. With St. Patrick’s Day coming up, I thought I should go back to the source and make something more or less authentic, and I discovered that:

“If your "soda bread" has raisins, it's not ‘soda bread! ‘ It's called ‘Spotted Dog’ or ‘Railway Cake!’  If it contains raisins, eggs, baking powder, sugar or shortening, it's called ‘cake,’ not ‘bread.’  All are tasty, but not traditional Irish Soda Bread! (…)  If one searches the internet using the term ‘Traditional Irish Soda Bread’ about 63,500 sites are listed. 98% of them aren't even close to being traditional.  Google ‘Irish Soda Bread’ and you will find 126,000 sites. Would ‘French Bread’ (15th century) still be ‘French Bread’ if whiskey, raisins, or other random ingredients were added to the mix?  Would Jewish Matzo (unleavened bread) used to remember the passage of the Israelites out of Egypt still be Matzo if we add raisins, butter, sugar, eggs, and even orange zest?   So why is traditional ‘Irish Soda Bread’ (19th century) turned into a dessert and labeled ‘Traditional Irish Soda Bread?’”

If you’ve been wandering through the wilderness of life for decades looking for a cause, the preservation of Irish Soda Breads seems to be a good one. Or, if you’re like me, enjoy the traditional one day and the hybrid fruits of modernity and blessed invention another day. Today I went somewhere in between, because when I'm riffin' on 'Traditional Irish Soda Bread' I DO DO DO add sweetner and raisins; dear Irish, I hope you'll absolve me. So, I used the recipe from the above society for Brown Irish Soda Bread, but I added some butter (which they allow “if you must deviate”) and some sweetener. Is it less of a travesty if I’m actually part Irish (a very, very, very small part)?

3 C whole wheat pastry flour

1 C white flour

2 Tbs butter

1 tsp salt

1 1/2 tsp baking soda

2 Tbs brown sugar

1 3/4 C buttermilk

2 Tbs molasses

Preheat oven to 425 degrees. Grease and flour a small corning ware dish or a cake pan. If you have a food processor, combine the flours, butter, salt, baking soda and sugar and blend until mixture resembles fine crumbs. If not, use your fingers to blend the butter into the flour, then add the other ingredients. Add the buttermilk and molasses until a thick, sticky dough is formed.

IMG_6774

Form the dough into a ball and turn into the greased pan/dish, and score the top with a knife.

IMG_6775

Cover with the corning ware lid, or with another cake pan, and bake for 30 minutes. Uncover and bake for 5-10 minutes more. Let cool in the pan 10 minutes before turning out onto a cooling rack, and let cool 20-30 more before cutting. Here’s my slice at breakfast this morning, toasted and spilling o’er with butter and honey. No one has said yet how much of an adulteration that is, but it’s freaking good.

IMG_6780

Tuesday, March 2, 2010

Poppy Seed Kolaches

image


What are kolaches? And where did I get this crazy idea? They’re a traditional Czech pastry, and no, I’m no Czech, nor do I know any Czechs. It’s just that since I made that borscht I’ve been on kind of an Eastern/Central European cuisine kick, looking up all sorts of recipes and dreaming of what to try. Somewhere in there I saw the word kolache and it sent me back to a blissful night and morning that I once spent in Houston, Texas. The father of the friend we were staying with came home that morning with several large boxes full of steaming kolaches, and I’ve had them on the brain every since. I’m pretty sure they were from the Kolache Factory, which has taken the Czech pastry to new heights and new levels of culinary debauchery, by stuffing it with eggs, jalapenos, ranch dressing, etc. You have to decide for yourself where you stand on this kind of adulteration of ethnic specialties. I thought they were delicious, but when I got it in my mind to make a first foray into kolache production, I decided to start as authentically as possible, with the traditional golden pastry with a glob of filling dropped into an indentation in the dough. Note: this recipe included a crumb topping, which I skipped, as well as a variety of other possible fillings, such as apricot, prune, cream cheese, etc. If you’d like to see the details of said variations, you can consult the original here: http://www.recipezaar.com/Sweet-Kolache-Recipe-39387

Also: Below is the full recipe, but I cut it in half and it made 24 kolaches. They are very delicious this morning halved, toasted, with a little butter…

Dough

3 packages active dry yeast

1/2 cup water

1 teaspoon sugar

1 cup butter

3/4 cup sugar

3 egg yolks

2 3/4 cups milk (scald and cool to lukewarm)

7 1/4 cups flour

3 teaspoons salt

Poppyseed Filling

1 1/2 cups poppy seeds

1 cup sugar

2 cups milk

2 tablespoons butter

1 tablespoon flour

Make the filling first: combine poppyseeds, sugar and milk, and cook over medium heat until mixture begins to thicken. Add butter, then flour which has been dissolved in a little bit of water. Cook, stirring constantly until thick-ish, about30 minutes. Allow to cool before use. (These are the original directions: I used the butter and flour to make a roux instead, then added milk, sugar, poppyseeds.)

To Make Dough And assemble Kolaches: Dissolve yeast in the 1/2 cup warm water in a tall glass, sprinkle with 1 teaspoon sugar and set aside to proof. In a large bowl, cream sugar and butter, add egg yolks and salt and mix well. Add the dissolved yeast, 1 cup of the flour and mix slowly with an electric mixer. Add the milk and continue adding as much of the remaining flour as you can mix in with a wooden spoon. Knead in enough of the remaining flour to make a moderately soft dough. (I found the dough to be very soft even after I’d added all the flour—in Colorado you do NOT add extra flour! I found my dough scraper to be immensely helpful in the kneading process to mediate the stickiness). Continue kneading until smooth and elastic, about 5 minutes. Place dough in a greased bowl, turn once to grease surface.

Cover and let rise until doubled in bulk, about 1 to 1 1/2 hours. Punch dough down and turn out onto lightly floured surface. Pinch off egg size portions and roll into a ball using the palm of your hands in circular motion. Place about 1 inch apart on greased pans. Brush kolaches with melted butter, cover with a cloth and let rise until light, about 1 hour.

Use your fingers to make an indentation in each ball and fill each opening with about 1 tablespoon of filling and let rise again for 20 minutes. Bake in a preheated 425ºF oven for about 10 minutes. Brush kolaches with melted butter as they come out of the oven (I skipped this, cause it seemed like I’d used a lot of butter already…but I’m sure it would have increased the tastiness factor by…at least 10).

Saturday, February 20, 2010

Supermoist Whole Grain Banana Breakfast Muffins

IMG_6605

I like weekend breakfasts to be a little bit special, with a little something out of the ordinary; no cereal allowed--unless it’s some awesome and nostalgic kind that we can’t normally afford to buy, like Cracklin’ Oat Bran, that suddenly went on sale for under $4 a box. When I decided on muffins this morning I of course got out my bags of whole wheat, barley, and rice flour, because I always use them in baking. They make the lightest, yummiest treats. And since I’ve been experimenting with using silken tofu in place of eggs for a friend whose son has allergies, I’ve decided that I should always replace an egg or two, as the tofu makes for a smooth texture and adds variety to the protein sources in our diet. End result: sweet, soft, springy, delicious, banana-full goodness, with the slightest hint of coconut and sunny overtones of honey.

3 medium bananas

1/3 C canola oil

1/2 C coconut milk

1/2 C honey

5 oz. silken tofu

1/2 C milk or soymilk

1 egg

1 tsp vanilla

2 Tbs brown sugar

1 C whole wheat pastry flour

1 C barley flour

1/2 C brown rice flour

1 1/2 tsp baking soda

1/2 tsp salt

2 Tbs wheat germ

Peel bananas and place in food processor; pulse until cut into small chunks. Transfer bananas to a large mixing bowl.

IMG_6598

Pour oil, coconut milk, honey and tofu to food processor and process until smooth. I just can’t express how much I love my food processor; I use it at least once almost everyday.

IMG_6602

Add milk, egg, vanilla and brown sugar, and process again until well mixed. Pour mixture into mixing bowl with bananas. In a separate bowl whisk the dry ingredients together, then add them to the wet ingredients, stirring gently until just combined. Do not over mix. Spoon batter into greased muffin pan. Sprinkle nuts (walnuts used here) on some or all of the muffins, if you desire.

IMG_6603

Bake at 375 degrees for 18-20 minutes, or until the top of muffins spring back when touched lightly. Allow muffins to cool in pan for 5 minutes before transferring to a cooling rack.        

Friday, February 5, 2010

Homemade Whole Wheat Pita Bread


IMG_6424

I found this recipe on Epicurious several years ago and still have not found its equal. And as a yeasted bread recipe goes, it’s surprisingly easy and low-maintenance. In fact it’s a great thing to do in the middle of a day at home that’s full of lots of other domestic tasks, because you never have to spend more than 10-15 minutes on any one step, and you have up to an hour in between steps to paint your toenails, do yoga, fold laundry, whatever. The original recipe had less wheat flour, but I don’t find that the increase is at all detrimental. I’m pretty sure that after you make these you will be VERY hard pressed to go back to store bought pita…

1 (1.4-oz) package active dry yeast (2 ½ tsp)

1 tsp honey

1 ¼ C warm water

2 C Whole wheat flour

1 C bread flour

¼ C olive oil

1 tsp salt (high altitudes require a little extra salt)

Stir together yeast, honey and ½ C warm water in large bowl, let stand about 5 minutes. In the meantime stir together flours in another bowl. After 5 minutes your yeast mixture should be foamy and look like this:

IMG_6410

If it doesn’t foam, either your yeast is too old, or your water was too hot.  Whisk ½ C flour mixture into yeast mixture until smooth, then cover with plastic wrap and let sit in a warm place until doubled in bulk and bubbly, about 45 minutes. At this point it should look like this:

IMG_6412

Stir in oil, remaining ¾ C water, salt and remaining flour mixture until a dough forms. Turn dough onto a floured surface and kneed until smooth and elastic, 8-10 minutes. Cover with plastic wrap and let rise 1 hour in warm place. After an hour it should look like this:

IMG_6420

Punch down dough and cut into 8 pieces. Form each into a ball, then flatten and roll into 6-7 in. discs. Place discs on baking sheet and cover with clean kitchen towel for 30 minutes.

IMG_6421

Set rack in lower third of oven, and preheat oven to 500º. Transfer pitas, 2 or 4 at a time, directly onto oven rack. Bake until just puffed and pale golden. Turn over with tongs and bake 1 minute more. Look at those babies puff!

IMG_6422