Monday, August 23, 2010

Harmony’s Creamy Pesto Dip

Makes about 2 cups

 IMG_8180

My delightful neighbor Harmony, author of the inspiring A Healthier You, recently gave us a container of her luscious and uber-healthy pesto dip. Chris and I both went crazy for it. So, having cornered her this morning where our fences meet, I asked her for the recipe. She said that she makes pesto with basil, garlic, olive oil and lemon juice (she didn’t say whether or not she adds pine nuts), then blends it into silken tofu. I came straight home and made my own batch with the quantities below.

1 16-oz container silken tofu, drained

1 clove garlic, peeled

1 C loosely packed fresh basil leaves

1 Tbs lemon juice

3 Tbs olive oil

salt to taste

Puree all ingredients in your blender or food processor.

Chris and I mostly dipped crackers and vegetables into the batch that Harmony gave us, but for lunch today I tried a few other things with my dip. I was in the mood for pasta, but I didn’t want to forgo my greens, nor did I want to turn on the stove top and start chopping stuff. So my solution was to eat my pasta over a spinach salad, and hence the Tortellini Spinach Salad was born:

IMG_8181 

I added strips of red pepper, some diced avocado and about 10 halved grape tomatoes to a pile of spinach, topped with cooked spinach-ricotta tortellini and a beautiful glob of the pesto dip. I had planned on drizzling a little balsamic vinegar, but went to my pantry and found NONE! One more thing to add to the shopping list…

I also tossed a few tablespoons of the dip with the rest of the cooked tortellini and put it in the fridge—I’m pretty sure Chris will WEEP when he finds that snack in there later today.

Thursday, August 19, 2010

Zucchini Madness I: zucchini fritters and zucchini french bread pizza

Makes 8-10 fritters and 2 8-in long pizzas

The season is upon us. The season of zucchini door ditching—look out, I might be leaving some on a porch near you. Last night I did my best to incorporate the intimidating harvest into some dishes that would be a little bit novel for Chris, who, in truth, doesn’t even like zucchini very much. I thought they both turned out great—the pizza especially, due to the deeply flavored roasted tomatoes. But more about that in a minute; let’s start with the fritters.

I had never made fritters before—in fact, I’m not sure that I’d ever eaten them. So I went to the internet and found a highly rated and very easy recipe—after all, I’ve got a newborn on the boob and a toddler on my lap, and right now simplicity takes precedence over culinary innovation and complexity. Therefore: this recipe has some ingredients that I wouldn’t ordinary use (out of excessive snobbiness and mild obsession), but they won’t kill ya, and next time I try them I’ll experiment with whole grain flours and natural seasonings. Conclusion: I loved the crispy edges and the fluffy center, and think they deserve a place in the pantheon of zucchini door ditching season favorites.

IMG_8166 

2 C grated zucchini

1/2 C milk

1 egg

1 C flour

1/2 oz. ranch dressing seasoning

1 1/2 tsp baking soda

Mix all ingredients until combined. Heat 1/2 to 1 inch canola oil in a large skillet. Drop four fritters (about 1/4 C batter each) into the oil. Cook about 4-5 minutes per side until golden and puffed up.

IMG_8161

 IMG_8162

And now the French bread pizzas (which could, of course, be made on regular ole pizza dough—we had half a loaf of delicious homemade bread left over from generous friends who brought us dinner after Fielding was born). As I said above, what really set these apart was the roasted tomato topping, which idea I pilfered from Passionate About Baking. Except that I had exactly five extremely ripe tomatoes when her recipe called for much more, so I knew that it wouldn’t go far. But the flavor is so deep, so resonant, it was the perfect way to use up tomatoes that were on their way out. All you do is half and seed your tomatoes, salt them and let them drain for a few minutes, then drizzle them well with olive oil and put them in a 250 degree oven for 4-5 hours--I used the toaster oven. By that time they should be shriveled, soft, and pungently flavored. Mash them up or put them in the food processor, and then you can either spread them on pizza crust, canapes, or pack them in oil and preserve them in the fridge for awhile. Here are mine, all mashed up:

IMG_8158

1/2 C roasted tomatoes, chopped or mashed

1 link cooked sausage (we used andouille)

1 medium zucchini, sliced into thin ribbons using a vegetable peeler or mandolin

1/2 green pepper, thinly sliced

1 clove garlic, minced

1 Tbs lemon juice

shredded cheese (we used cheddar jack)

Slice your 8-in hunk of baguette horizontally. Drizzle olive oil on each half, rub with a clove of garlic and toast until lightly browned.

While bread is toasting, sauté the garlic and green pepper in a little olive oil until they begin to soften. Add the zucchini, stirring frequently until soft. Add lemon juice and salt and pepper to taste. Set aside.
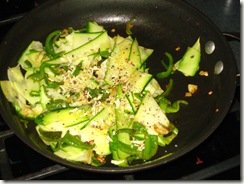
IMG_8156

Spread roasted tomatoes on each baguette half, top with sliced sausage, zucchini mixture and cheese.
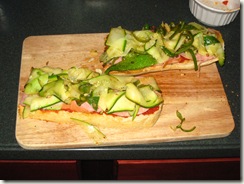
   IMG_8159

Broil until cheese is melted and beginning to brown.

IMG_8163

Monday, August 16, 2010

Savory Summer Squash Muffins

makes 12 muffins

 IMG_8119

The garden—and in particular the squash plants—is running amok. I’ve already got three bags of frozen shredded zucchini waiting to emerge on a winter day in need of a little sunshine. And now the summer squash is starting to overwhelm me, and I am kind of sick of sweet quick breads (blasphemy!). Enter the savory muffin! I have great plans to experiment on this technique, especially since my friend Lisa recently shared with me that she’s been making muffins on the BBQ (!!). But for round one, I made a fairly basic incarnation of the savory muffin.

1/2 C oil (olive or canola)

1 C milk + 1 Tbs lemon juice (mixed together and left to curdle 5 minutes—or if you have real buttermilk, even better!)

2 eggs

2-3 C shredded summer squash

1/4 C minced chives or green onion

1 C whole wheat flour

3/4 C all-purpose flour

1/2 C barley flour

1/2 tsp salt

1 1/2 tsp baking soda

1/4 tsp dried dill

1 tsp Parisian bonnes herbes

1/2 – 1 C shredded cheese (I used cheddar jack)

Whisk together oil, milk + lemon juice and eggs, then stir in squash and chive/onion. In a separate bowl whisk together dry ingredients (including spices). Add dry ingredients to wet, stirring until just combined. Gently incorporate shredded cheese. Preheat oven to 350. Fill muffin cups close to full. Bake 18-20 minutes, or until muffin tops spring back when touched.

Sliced in half, toasted, with some scrambled egg and ham…about the most satisfying breakfast I can think of.

IMG_8121

Tuesday, August 10, 2010

Freezer meals part I: Enchiladas for all palates

Serves 5-6

IMG_8089 

In preparation for the transition from one-child family to two-child family, the difficulties and challenges of which will rear their ugly head after all of my generous helpers have left off cooking and doing dishes for me at the end of the week, mom has been helping me plan and execute some healthy freezer meals. This one includes some of the basic necessities of the different members of the household—meat for Chris, vegetables for me, white tortillas for Chris, whole wheat tortillas for me, Tex-Mex deliciousness for both of us.

Tortillas—I used two white, two whole wheat (both burrito-size), and four 6-in. corn

1 lb ground turkey

1 onion. chopped

2 cloves garlic, minced

1 zucchini, sliced

1-2 green peppers, chopped

1 15-oz. can diced tomatoes

1 can chopped green chilies

1 15-oz. can black beans, drained

2 Tbs taco seasoning

cheese (cheddar jack or pepper jack are good choices)

jarred or homemade salsa

cilantro-lime sauce (I’ve been putting this on everything lately—you can find the recipe with my fish tacos.)

Enchilada sauce (from a can or packet)

Sauté onion and garlic in a little olive oil until translucent. Add turkey and cook until browned. Stir in zucchini and peppers and cook five minutes. Add tomatoes, green chilies and seasoning. Cover and cook 5-7 minutes, until vegetables are tender. Add black beans and cook a few more minutes until liquid evaporates.

IMG_8086

Grease a 9x13-in pan. Lay your tortillas out on the counter. Spread a glob of filling in each, followed by a sprinkling of cheese, a spoonful if salsa and a drizzle of cilantro-lime sauce. Fold up the enchiladas and wedge them into the pan together

IMG_8088

Pour enchilada sauce over, sprinkle with additional cheese. At this point you can freeze them as is, or bake them first, and then freeze them. Bake for 35 minutes at 350 degrees. Reheat at 250 degrees for 30 minutes.

Monday, August 9, 2010

Pear Custard Tart

Serves 8

IMG_8030

I’m not sure why there is such a proliferation of desserts on here lately—we really aren’t eating all that much dessert. We have had company since Fielding was born, and that was the occasion for this particular delight. And when I say delight, I mean deeeee-light. My mother has declared this “one of the all-time great desserts” that she has tasted in her life time. That’s saying a lot, coming from someone with a sweet tooth and who has all manner of sweet lusciousness to choose from when picking a life-time frontrunner for number one. The great advantage to this tart is that you can whip it up in about 15 minutes, making it ideal for casual weeknights and unexpected guests.

Crust:

1/2 C cold butter, cut into chunks

1/4 C white sugar

1 1/2 C flour (I always combine whole wheat and white flours)

pinch salt

1 tsp vanilla

1-2 Tbs cream, half and half or milk


Filling:

2-3 pears peeled and sliced

1/4 butter at room temperature

1 C sugar

2 eggs

1 tsp vanilla

pinch salt

1/4 C flour

For crust: place flour, sugar, butter and salt in the food processor and process until mixture resembles coarse crumbs. Slowly add vanilla and milk until dough comes together into a ball. Press crust into greased 9-in pie pan, tart pan or spring form pan and refrigerate until ready to fill. (I always use foil in my spring form pan because I have bad luck getting it to release well on such crusts…I don’t know why.)


IMG_8027

For the filling: Set the pears aside. Place remaining ingredients in the food processor and blend until smooth. Peel, core and slice the pears; arrange them in a circular pattern in the crust and pour the filling over. Bake at 350 degrees for 45-55 minutes.


 IMG_8028 IMG_8029

For a variation: substitute almond extract for vanilla, sprinkle sliced, toasted almonds on top, and/or add 1/2 ground almonds to the crust.

Tuesday, August 3, 2010

Provencal Stuffed Garden Vegetables

Serves 4-6

IMG_7951  

Yes, I made and photographed these before Fielding arrived. I was actually kind of a kitchen tornado in the days preceding his arrival—I must have sensed it, because we came home to some tasty leftovers and snacks and, thank goodness, a manageable overflow from the garden (boy did we grow one hell of a zucchini during our 30-hr hospital stay).

6-8 stuffable vegetables, such as tomatoes, onions, pattypan squash, etc.

1 lb ground meat (I used turkey) or sausage

1 onion, chopped

2-3 cloves garlic

5-6 large mushrooms

1 C chopped fresh basil

1 15-oz. diced tomatoes

1 C uncooked brown rice

1 1/2 C water or broth

1/2 C diced cured black olives

salt

grated parmesan

bread crumbs

First hollow out your vegetables, saving all of the innards. I used both a melon baller and a grapefruit spoon, depending on the shape and texture of the vegetable.

IMG_7936   

Next, sauté the onions and garlic until translucent. Add the ground meat or sausage and cook until no longer pink. Add the mushrooms and basil and continue sautéing until soft.

IMG_7940

Add the rice, diced tomatoes, vegetable inards (I pulsed them in the food processor beforehand) and water/broth. Bring to a boil, cover, reduce heat to low and let simmer until rice is tender and liquid is absorbed.

IMG_7941   

If your vegetables are especially dense or big, as onions and pattypan squash are, you should parboil them for about 10 minutes before stuffing. Otherwise just fill the cavities with the rice mixture, and top with finely grated parmesan and bread crumbs.

IMG_7945    

Mix the remaining rice with more grated parmesan and spread it in a 9 x 13 in. pan. Place the stuffed vegetables on top. Cover loosely with foil and bake for one hour at 350 degrees.

IMG_7950

Pregnant Lady finally gets bun out of oven

At long last, I’ve been delivered of my pelvic burden, in the form of the handsomest, sweetest little 8lb wonder ever. Fielding Christopher Gray left the oven a few days ahead of schedule, on Sunday Aug. 1. What a great birthday that is. Here are a few shots of his first few days.

Daddy setting him down for the big weigh-in (8lbs 1.5oz):

 IMG_7965

That’s one proud papa.

IMG_7968

I think everyone has gotten a glimpse of this curly mop by now. That was right after his bath—I don’t think it will look like that all the time. Right now he’s got sort of a 1940’s film star wave going on.

IMG_7970

Relaxing evening at the hospital after making his big debut.

IMG_7972 IMG_7974 IMG_7978

We came home yesterday and Stella was so eager to make his acquaintance; they’re pals already.

IMG_8025

The big question is whether the blog will go on now that the Pregnant Lady is no longer pregnant. Well, she’s still pretty hungry….

Sunday, July 25, 2010

Currant Frozen Yogurt

Serves 6-8

IMG_7929

Talk about enjoying the fruits of our labors! On Tuesday my friend Harmony and I, after months of scheming and failed attempts, finally made our first trip this season to the magnificent Berry Patch Farms in Brighton, CO, a family owned you-pick organic farm. Among the other things that we harvested that day was an incredibly labor-intensive pile of currants. Neither of us has much experience with fresh currants, and Harmony had the unparalleled idea of turning them into frozen yogurt. This was a total boon because I’d been meaning to try frozen yogurt in my ice cream maker for awhile and just hadn’t gotten around to it. One batch of homemade yogurt later, the dream was alive. It’s amazing how it’s sweet, tangy, and creamy all at the same time.

But first, a few pics from the farm. Here we are in the hay wagon!

 38257_1464228838304_1010987646_31333828_3970600_n

Dragging the kids around past snack and bedtime:

38196_1464228078285_1010987646_31333818_7191442_n

Strawberry fields forever—Sawyer eats every other berry he picks:

38196_1464228278290_1010987646_31333823_5151302_n

And here are the luscious, ruby red currants.

IMG_7907

And now the recipe:

2 1/2 C thick plain yogurt (I used my homemade yogurt recipe with organic one and a half percent milk, strained to make it thicker)

1/2 C sugar

1 1/2 C currants, washed and picked through to remove debris

1/2 tsp vanilla

Puree the currants in the food processor then run the mixture through a sieve to remove the seeds and bits of skin. Stir the remaining puree into the yogurt. Add the sugar and vanilla and stir until blended.

IMG_7909

Cover and chill. Process in your ice cream maker according to manufacturer’s instructions. Degustez!!


Grilled Pizza with Beet Greens and Heirloom Tomatoes

Serves 4

IMG_7922

I can’t believe how well this turned out. I’m still sort of gloating in my mind over how delicious it was, even if Chris did say, “too bad there was no Italian sausage to put on here…” What’s even better, it helped me use up all the beet greens from the garden that I’ve been saving while on some kind of insane beet-eating quest this week. Seriously, I’ve had beets in some form or other for lunch everyday since Monday I think. Anyway, you could do this pizza with a huge variety of different toppings, obviously. What makes it special, I think, is the pesto, the combination of feta and mozzarella, and the fact that it’s grilled rather than oven-baked (always a plus when the temps are in the 90’s).

Dough:

1 1/2 C white flour

1 1/2 C wheat flour

1 tsp dry active yeast

2 tsp kosher salt

2 Tbs olive oil

1 1/4 C water

Combine all ingredients in your food processor. Process for 30 seconds until mixture forms a ball. Turn out onto a lightly floured surface and knead a few times until smooth. Place in an oiled bowl and cover with a dish towel. Let rise in a warm place for 1-2 hours.

Toppings

Several cups of beet (or other) greens (mine actually included the last of some garden spinach too)

1-2 cloves garlic, minced

olive oil

balsamic vinegar

pesto

feta cheese

sliced tomatoes

fresh basil

Mozzarella cheese (I used an Italian blend this time, with Asiago, etc.)

Start by washing and chopping your greens, then sautéing them in a little olive oil with the garlic. After they’re good and wilted and are starting to get dry, give them a splash of balsamic vinegar, sprinkle on a little sea salt and turn off the heat.

IMG_7912

When the crust is ready you just need to decide what your grilling system is going to be. Some advocate preheating the grill, rolling out the dough, oiling it on both sides, then placing it directly on the grate. You cook it on one side for a few minutes, flip it for another few, and THEN put your toppings on. I actually didn’t know about this technique when I started tonight, so I used the vegetable basket for our grill, and spread the dough on it (after oiling it up good) like so:

 IMG_7915

I spread pesto sauce on it after pressing it into the basket. Look at this glorious container of farmer’s market termaters:

IMG_7914 

On top of the pesto I spread the greens, topped with a little feta (I always leave cheese quantities to your discretion—we tend to go easy), and then the tomatoes.

IMG_7917

Tear up some fresh basil and sprinkle it over the tomatoes, then top with shredded mozz or Italian cheese blend of your choice. Fresh mozz would, of course, have been out of this world, but we were plum out.

IMG_7918

I let the grill heat to about 450 or 475 before putting the pizza in, and cooked it for about 12 minutes, which was perfect. Here she is just as I’m about to remove and slice ‘er.

IMG_7919

So stinkin’ pretty! And what’s better than cutting up homemade pizza on your patio and taking in the evening air?

IMG_7920 

This is the happiest plate ever. And the happiest belly. Mama will be happier when Sawyer doesn’t insist that she cut the skin off the peaches.

IMG_7924

Saturday, July 24, 2010

Brownies with Speculoos Pâte à Tartiner

Serves 8

IMG_7895

This requires a little background, I believe. A pâte à tartiner is simply a spread, usually sweet, something you would put on bread or a crepe or a scone, for example. Nutella is probably the pâte à tartiner that Americans know best, but brace yourselves, fellow countrymen, because there’s an up and coming, snot-nosed hotshot called Speculoos Pâte à Tartiner ready to take its place. I first read about this on David Lebovitz's blog a few months ago when he discovered it at his local Monoprix. I was completely inspired and outrageously curious. Luckily a friend of mine was in Paris at that moment, so I shot off a quick email with the link to the story, and asked him, if it wasn’t too much trouble, to pick up a jar for me. My generous friend brought TWO jars back for me!

image

But let me backtrack: what is this stuff?? Maybe you’ve heard of a sublime little gingerbread cookie called Biscoff—you get them on airplanes sometimes in the states (after a little research I’ve discovered that it’s Delta Airlines that serves them regularly). image

Or you can find them at a lot of grocery stores in the fancy cookie section--they are European, after all. In France those cookies are called Speculoos, and the French have a passion for dipping them in hot spiced wine. Perhaps if you’ve seen the movie Amelie you remember a scene where the Glass Man gives Amelie “du vin chaud et des speculoos!” Or maybe not. Anyway, this pâte à tartiner is the soft liquid version of that cookies. It’s like Nutella, like I said, but Speculoos flavored! And it’s indescribable. Everyone that comes to the house these days gets a sample—“Wait, don’t go yet, I have something incredible for you to taste!” And they all marvel. No one knows quite what to do with it, since our country doesn’t have a long history of putting sweet spreads on bread beyond jam, and we don’t do much crepe eating normally. Most of the lucky samplers have agreed, therefore, that the best solution is to just stick your finger in the jar once a day, when you need just a little somethin’ sweet. I agreed, until I saw a recipe in Sunset Magazine for brownies with globs of Nutella in the center. I HAD to try this with the Speculoos Pâte à Tartiner. I know most people don’t have access to random other people who are returning from France and who can smuggle a jar home for them, so you’ll be glad to know that the American branch of the company, Biscoff, sells the spread.

1/2 C butter

1 oz. unsweetened chocolate, finely chopped

1 C sugar

1/4 C unsweetened cocoa powder

2 large eggs

1 tsp vanilla

1/2 tsp salt

3/4 C flour

1/2 C Speculoos Pâte à Tartiner (Ok, or Nutella…)

Preheat oven to 350 degrees. Grease 8 cups of a muffin tin (I used cupcake papers because I don’t trust my muffin tin, a cheap piece of crap, to release the things I bake in it). Melt butter in microwave, stir in chopped chocolate until smooth. Add sugar and cocoa and stir to blend. Whisk in eggs, vanilla and salt. Add flour and blend until smooth. Spoon batter into muffin cups. Make a small dent in the center of each and spoon in 1 Tbs of pâte à tartiner. Bake for 20-24 minutes. Let cool 10 minutes, loosen, remove from pan, and transfer to a cooling rack.

IMG_7896